Nothing could be worse than losing or accidentally deleting a Word file when it’s really important to you. Well, you may also go through the same situation because you probably don’t know how to recover saved or unsaved word files.
Yes, you can recover both saved and unsaved word files and the process is pretty easy. Wondering how to recover a word file? And you can recover a word file through temporary files, Autorecover files, recycle bin as well as data recovery software.
However, if you don’t know the use process of any of these solutions, follow this article. Here you can learn about all the off and other related aspects with step by step instructions. Stay tuned.
How To Recover A Word File?
There are a lot of ways that you can follow to recover a word file and all of them require different actions. However, if you want to know about some of them with step by step instructions, follow the section below. Here we’ll show the reliable methods to recover a word file:

Saved Files:
When it comes to recovering a Word file, another key issue to be concerned about is saved and unsaved files. However, you shouldn’t worry about it as you can recover both of them. Here, we’ll show you how to recover a saved Word file. Have a look:
1. Recover A Word File From Recycle Bin
After deleting your word file from your computer, if you don’t delete it from the recycle bin, you can easily recover the file. Here is the process you can follow to recover a word file from recycle bin:

- Open the “Recycle Bin” feature from your computer and from here check for your deleted word file.
- Choose the find you want to recover and then click on “Restore” and you’re done.
Note: If you forget the name of your Word file, just search for a file with DOT, DOC, or DOCX at the end.
2. Recover A Word File Through Recover Software
If you’ve permanently deleted your word find and now want to recover that file, then you can rely on recovery software. You can use software like Tenorshare 4DDiG that allows for recovering nearly all types of documents. So how to recover a permanently deleted word file through Tenorshare 4DDiG? Follow the section below:

Install the Tenorshare 4DDiG:
Start with downloading the Tenorshare 4DDiG on your device and then install it like every other software.

Choose The Word File Location:
After that, launch the software and choose the location where the word file was stored before deletion.
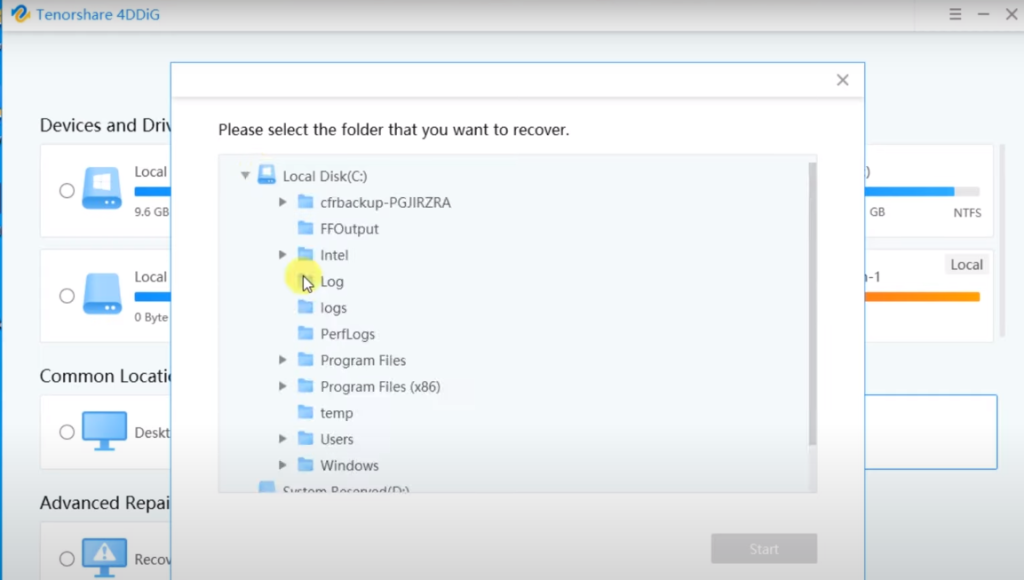
Begin The Scanning:
The program will start searching for deleted items from the chosen drive.
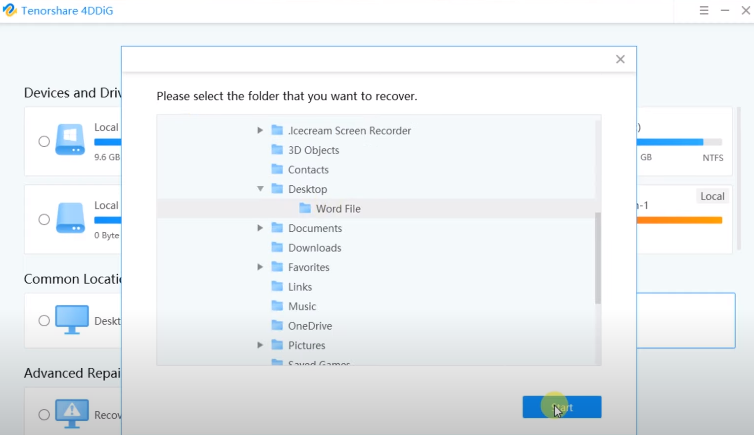
Select The File And Recover It:
Now select the deleted sound file and preview it if you want to see it. Now tap on the “Recover” button and choose a location for saving.
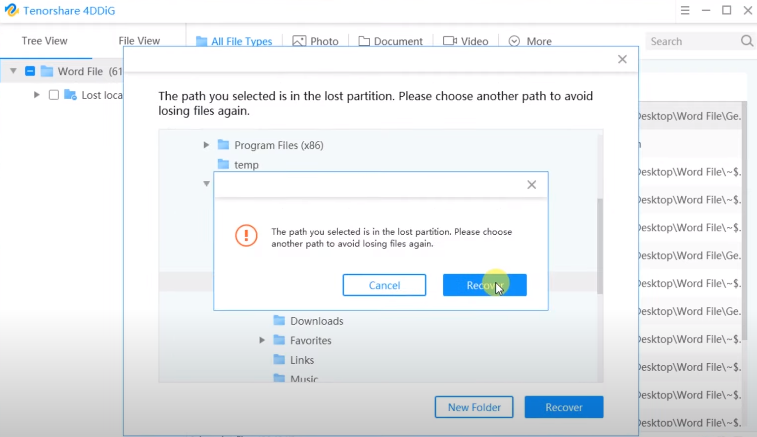
Note: When saving the recovery file, do not save it to the previous location and choose a new location to save.
Unsaved Files:
Above we’ve shown how to recover a saved Word file. However, if you want to recover unsaved files, you can also do it in many different ways. Some of the ways are included below:
1. Recover Unsaved Word File From Temporary Files
The most usual solution you can follow to recover unsaved word files is utilizing the temporary files option. And you can use this facility on all MS Office programs between 2013-2019.
So how does this facility work and how to use this option to recover your unsaved and lost word file? In that case, follow the section below to learn about it:
- Launch the Word file and tap on the “File” option
- Select “Manage Document” next, and then, from the drop-down list, select “Recover Unsaved Documents” once more
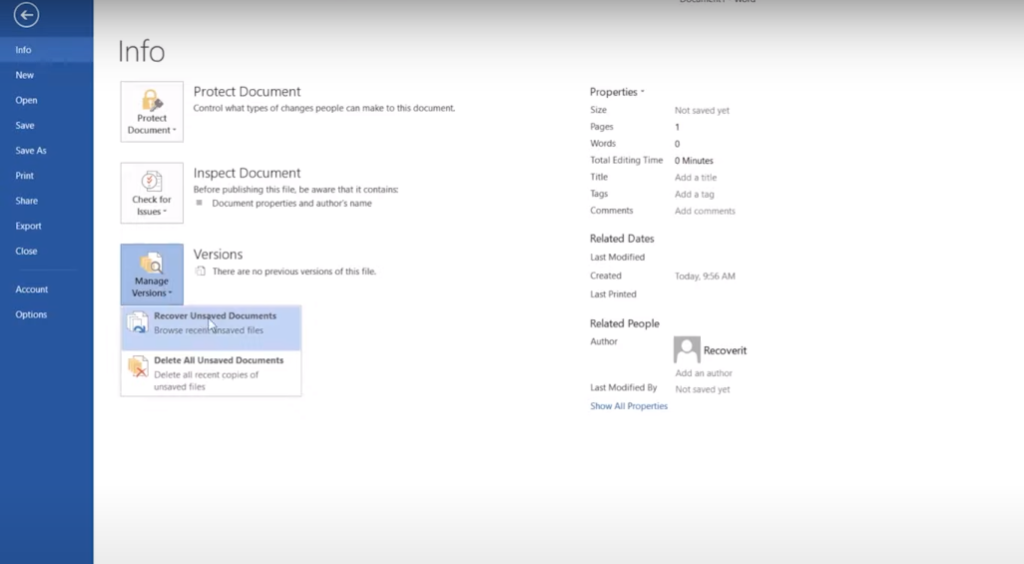
- Here you will see a dialog box, check if your unsaved file is there or not
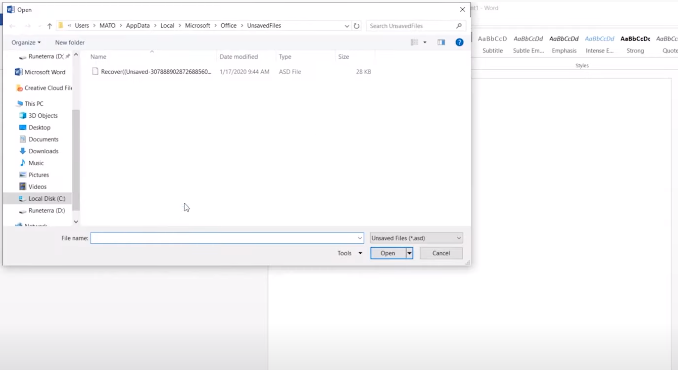
- When you’ll see the file you want to recover, simply select it and tap on the “Open” and then “Save As” button for the recovery
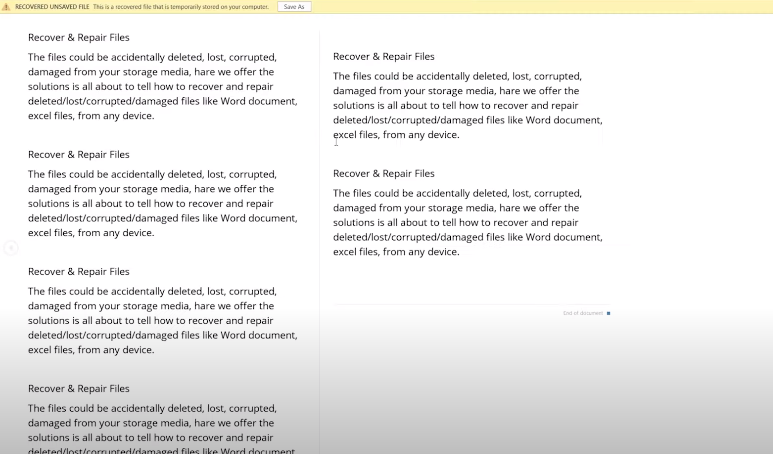
After that, your unsaved lost word file should be recovered.
See Also: How To Recover Unsaved Excel File
How To Reduce Unsaved Word File Losing Issues?
You already know how to recover Word files in different ways. However, do you want to know if is there a way you can try to prevent this file losing issue?
Fortunately, there are two different options are available that you can try, including AutoSave and AutoRecover. We’ll talk about both of them throughout the section below. Have a look:
AutoSave
Autosave is an innovative feature available exclusively to Office 365 subscribers. It’ll allow the users to save the file automatically without saving the Word file manually. If you’re an Office 365 user, then you can automatically save your documents on OneDrive or SharePoint.
Whenever you enable the autosave feature, this feature will automatically save the Word file whenever you work on it. People who work on MS Word on a daily basis should go for this feature.
AutoRecover
If you’re not an Office 365 subscriber, you can follow the AutoRecover option to prevent accidental data loss. Want to know how to enable this feature? Follow the below steps:
- Navigate to the File and then select the “Options” and then switch to the “Save” tab from the left side
- Select the “Save AutoRecover Information Every X Minutes”, and then enter the number of minutes you want between each save.
- After that, select “Keep the last auto-recovered version if I close without saving” and hit OK to save your changes.
See, it’s really easy to turn on the AutoRecover feature. Whether you go for AutoRecover or AutoSave, both will prevent accidental data loss or word file loss issues.
Closing Thoughts
You don’t have to worry about losing your Word files. That is because now you know how to recover a word file as well as the ways to prevent this condition.
Simply follow one of the methods we’ve listed throughout this article and say bye to word file losing issues. However, among all the solutions, if you want to follow the easiest one, then go for recovery software.
Using recovery software like Tenorshare 4DDiG will let you recover your Word file effortlessly. Today try one of the methods and get all the lost Word files back instantly.