When you’re surfing on the internet for whatever reason, nothing could be more frustrating than a slow Wi-Fi connection. However, if you are also going through the same situation, you probably don’t know how to increase Wi-Fi speed in laptop or desktop.
Well, you can follow many different solutions to speed up the Wi-Fi connection. You can change the router position, close the background apps, and also change the DNS server.
Moreover, you can disable the Windows update services and switch the Wi-Fi frequency band as well. Perhaps all the solutions seem a bit complicated. No worries, we’re here to help. Throughout this article, we’ll show you all the solutions in detail.
Why You’re Not Getting Enough Speed From Your Wi-Fi Network?
Why I’m not getting sufficient speed from my Wi-Fi network is one question that arises in all internet users’ minds. Well, if you’re also going through the same condition, then follow the section below. Here we’ll discuss things that cause slow Wi-Fi connection.

- Bad router position is one of the core reasons to face slow wifi connection
- Misconfigured bandwidth is also a culprit in facing slow internet issues
- Many background programs can slow down a connection
- Sometimes using a VPN service is also a core reason to face slow internet or wifi connection
These are some of the common reasons to face slow internet issues while using a wifi connection. However, if you’re also suffering from a slow net issue, no worries, we’ve got you covered. Some reliable solutions are going to be shown in the next section.
How To Increase Wi-Fi Speed In Laptop
Here is the final section, which is the solution to fixing the slow Wi-Fi issue. In this section, we’ve included some of the most reliable methods or solutions to deal with slow Wi-Fi connections. Have a look:

1. Update Your System:
If you haven’t updated your Windows operating system for a long time, this can be the main reason for facing slow Wi-Fi network problems. Therefore, before performing any changes, please make sure to update Windows with the latest update.
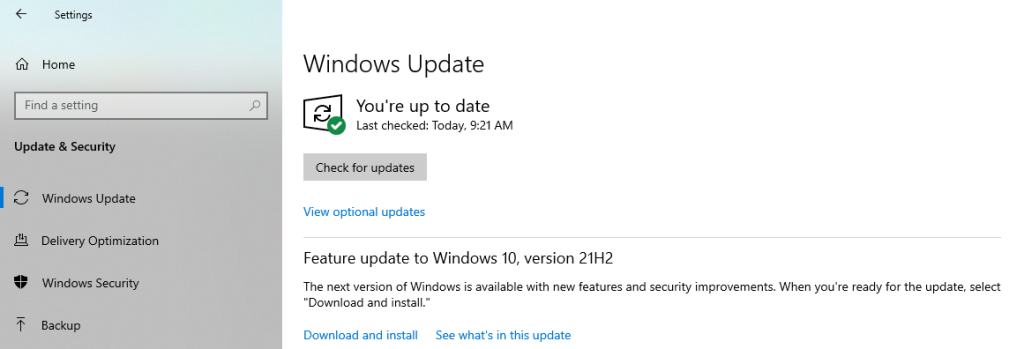
You might not know that every update comes with new improvements, which can also affect the internet connection. Alongside the windows, you also have to update the router firmware too. Plus, it’s always good to update the router firmware as new updates always bring improvements.
2. Change Router Position:
The very first thing you can do to increase your wifi speed in a laptop is to change the router position. You may not know that the wifi signal actually depends on the router design and specs.

Therefore, it’s always a good idea to use your laptop near the router. When you use your laptop far away from the router, then several obstacles like floors and walls can cause slow speed.
Alongside using your laptop near the router, another solution you can follow is placing the router in your house’s center position. So that you can receive the signal throughout your home.
3. Close Unnecessary Background Running Applications:
If you are still experiencing slow WIFI speed, the next thing you can do is close all unnecessary background apps. Slow internet is caused by apps consuming bandwidth in the background.
Therefore, it is always essential to close all background apps to ensure that your bandwidth is not wasted on unnecessary things. However, if you don’t know how to disable the background app, follow the section below for a step by step guidance:
- Start with opening the Task Manager from your laptop, and you can launch it in many different ways. Here we’ll use the shortcut which is “Ctrl + Shift + Esc,” simply press all of them together
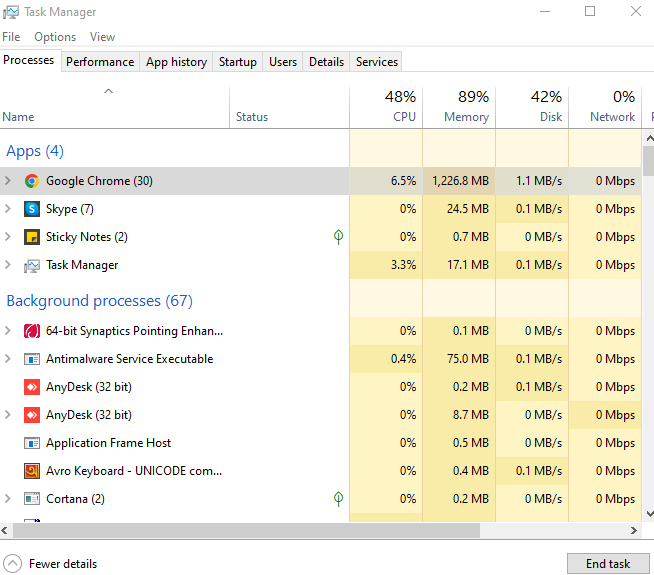
- From there tap on the “Performance” tab and select the “Open Resource Monitor” from the below side
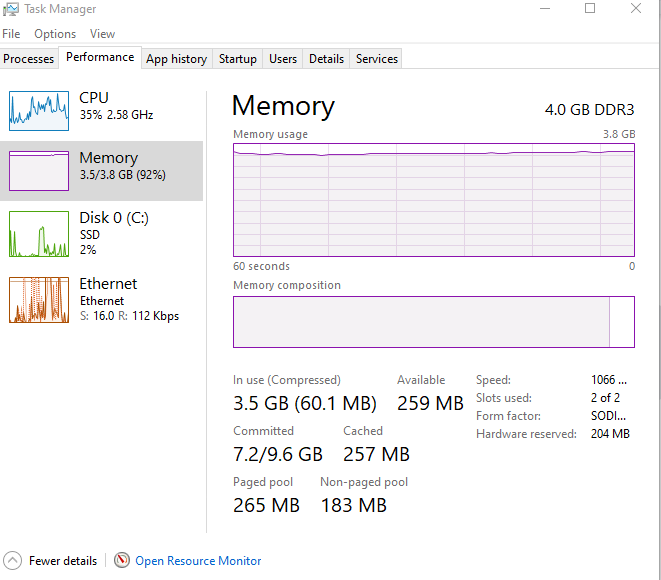
- Now select the service or program that consumes most of the bandwidth from the “Open Resource Monitor” window. After that, right-click on the program or service and select “End Process”
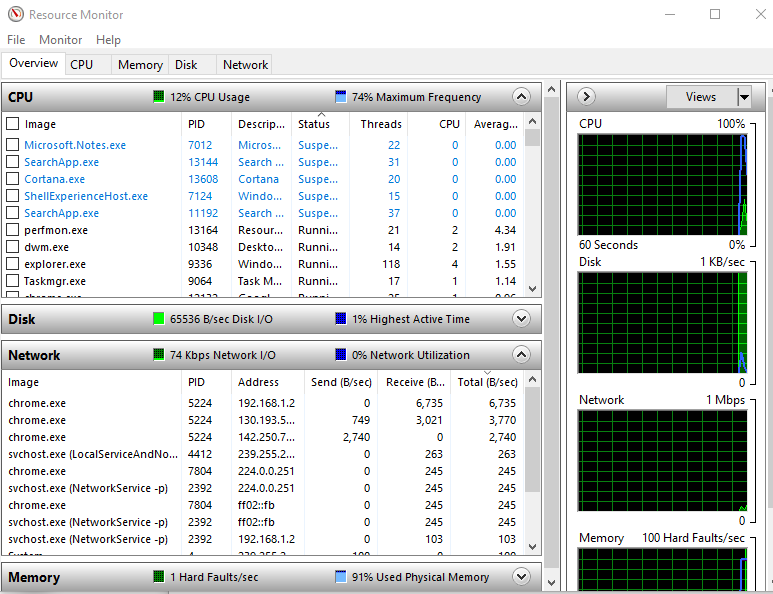
Simply close all the unnecessary programs, that will help to increase the Wi-Fi speed.
4. Change The DNS Server:
The default setting for the DNS server is automatic, which can cause slow internet connections. However, you can easily modify or change the default DNS to increase your Wi-Fi speed.
Here we’re going to show you how you can modify or change a default DNS into Google or Open DNS. Check out the section below:
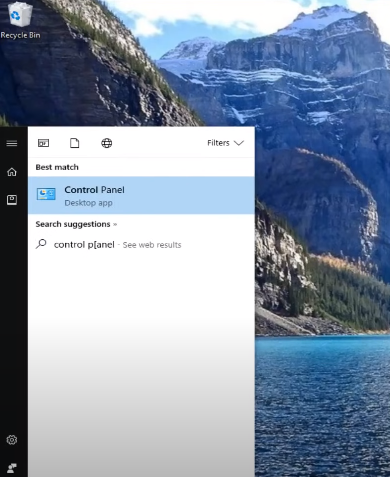
Step: 1 – Open the Control Panel from your laptop. Click on the Start icon and use the search box to do it. Now search for “Command Panel”
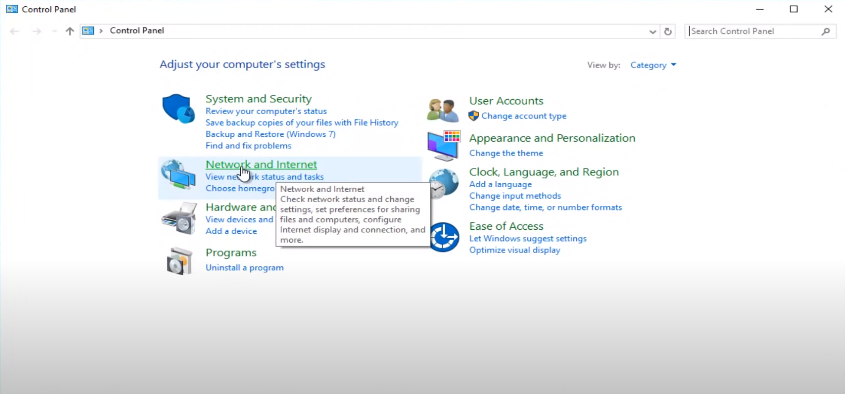
Step: 2 – After launching the “Command Panel” now select the “Network & Internet” from there
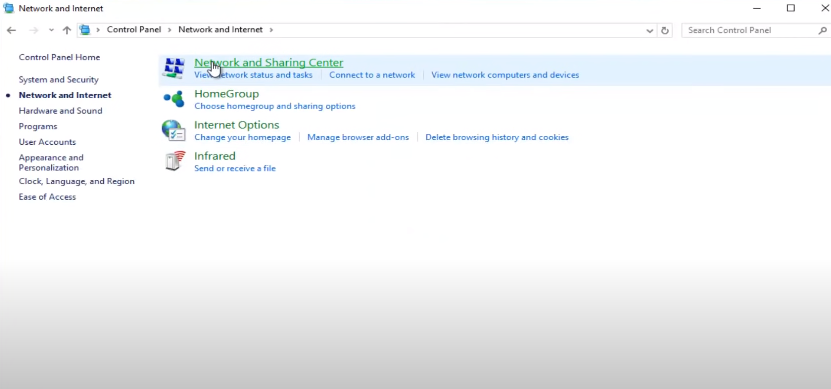
Step: 3 – Tap on “Network and Sharing Center”
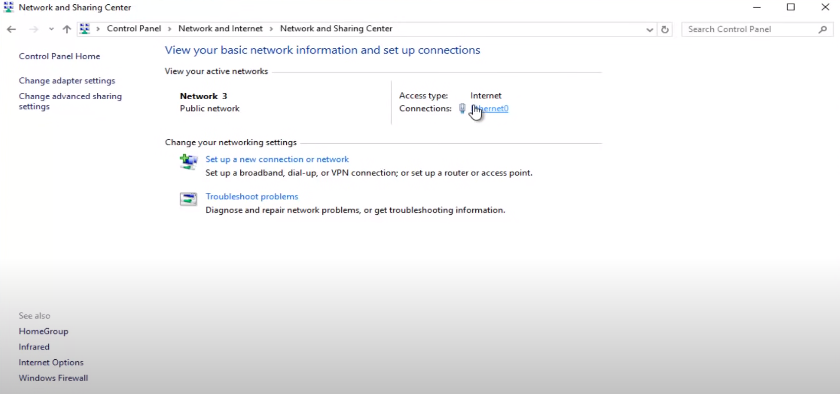
Step: 4 – Now select the Wi-Fi from the “View your active networks” section. Simply click on the hyperlink under the Wi-Fi.
Step: 5 – When the new window appears on your laptop screen, from there select “Properties,” then double-click on the “Internet Protocol Version 4”
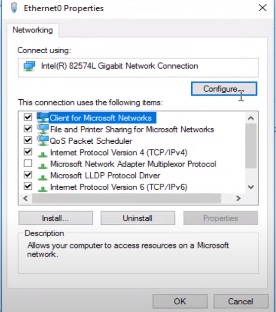
Step: 6 – It’s time to modify the DNS server address. Here we’ll use Google DNS. You have to place a new DNS server on both Preferred DNS and Alternate DNS. To do so follow the section below.
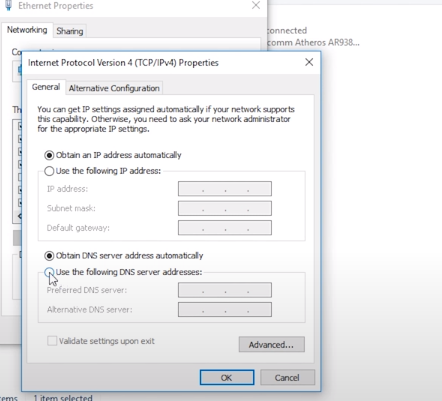
- Preferred DNS server: 8.8.8.8
- Alternate DNS Server: 8.8.4.4
Step: 7 – Once you’ve placed the DNS servers properly, now simply click on “Ok” to save the new changes.
Once you’ve done modifying the default DNS server, now simply restart your laptop. When the restarting is done, check the upload and download speed of your laptop to see if the Wi-Fi speed is improved or not.
5. Toggle Off The Metered Connection:
Another effective solution you can follow to speed up your Wi-Fi network on a laptop is disabling metered connections. This is a simple and easy method that can be completed in a minute by anyone.
However, if you’re not familiar with this service, then follow the section below to know how to disable this program. Check it out:
- To access the settings, click on the window icon and then select the ‘Settings’ option
- After that, choose “Network & Internet”
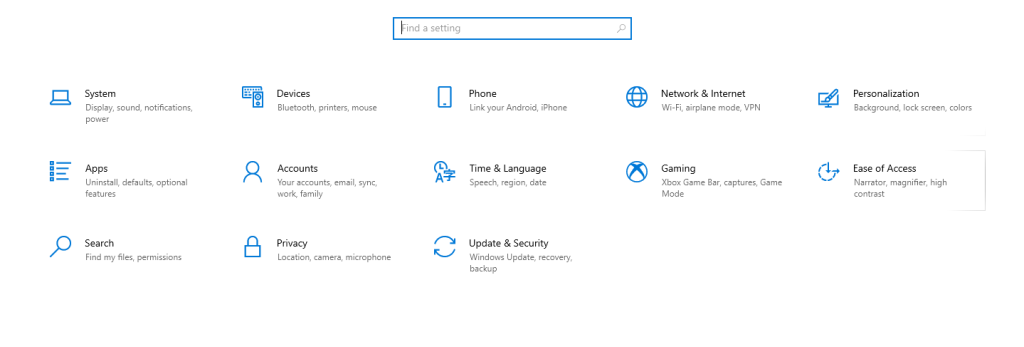
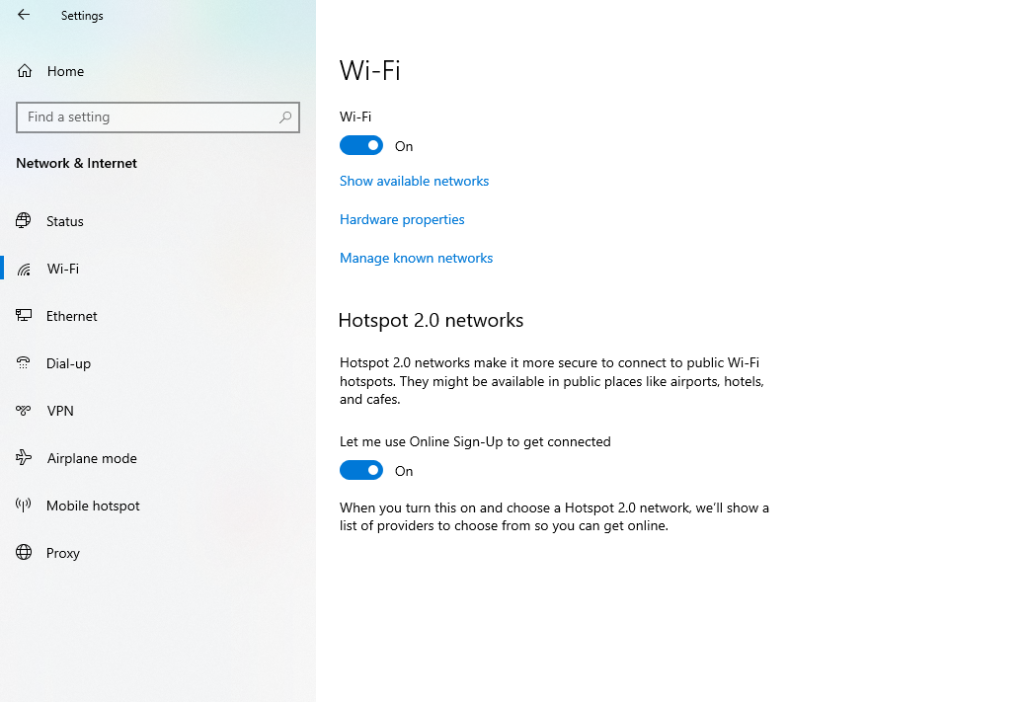
- Once a new window appears on your laptop screen, select the “Wi-Fi from the side panel. After that select “Manage known networks”
- Now choose your desired Wi-Fi network and tap on it
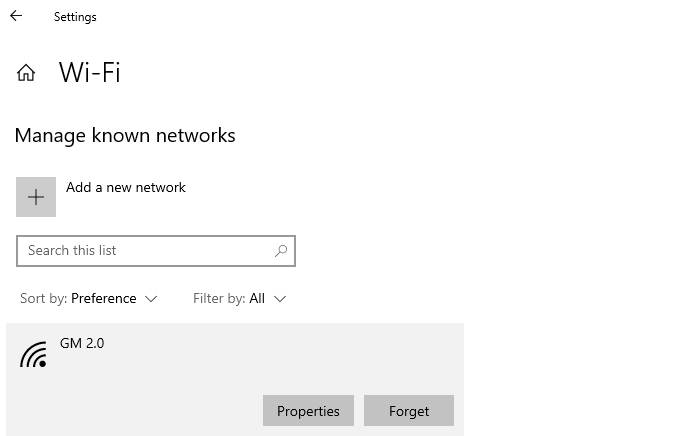
- Click on “Properties” and then simply toggle off or disable the “Set as metered connection” option.

After disabling this program, restart your laptop and check if the wifi network speed is improved or not. If not, then no worries, we’ve more solutions. Follow our next method or solution.
6. Disable The Windows Update Services:
Disabling the Windows update service is another action you can take to increase the speed of your wifi speed. When Windows Update is being downloaded, it can affect internet speed.
So, if you’re facing internet issues, then it’s better to disable the update temporarily. Here is how you can disable the Windows update service, have a look:
- Press Windows and R to launch the Run Dialogue box. After that type service.msc and press enter
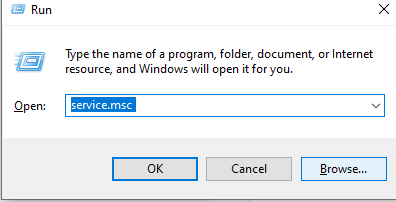
- Now select the “Windows Update” from the various options

- Right-click on the Windows update and select the “Properties” from there
- After that, change the Startup type to Disable
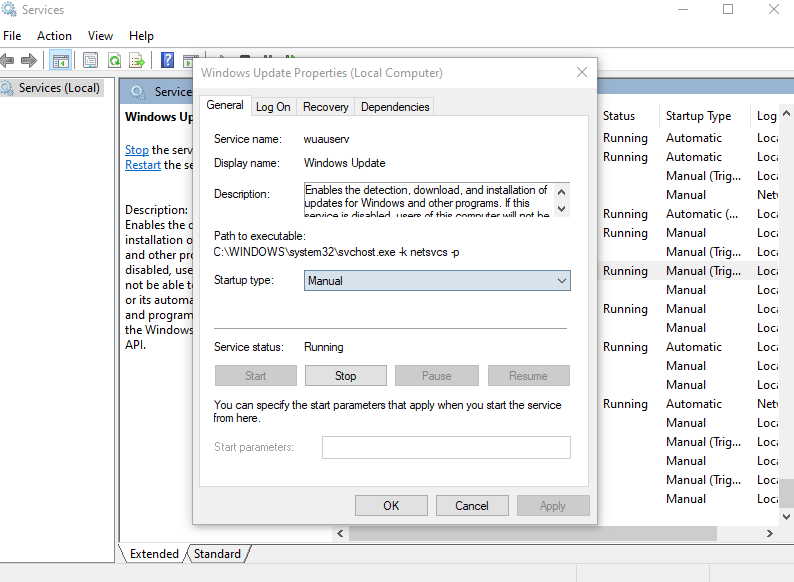
- Again tap on the “Stop” under the “Service status” and click apply and then ok.
See how easy it is. However, you can easily re-enable the automatic update by following the same method. Just select the “Automatic” option from the Startup Type option. +
Related Reading: How Much Internet Speed Can My Laptop Handle?
Closing Thoughts
A slow Wi-Fi connection can significantly impact your productivity as well as make you annoyed. Therefore, knowing how to increase Wi-Fi speed in laptop and desktop is a kind of blessing.
However, throughout this article, we’ve shown several solutions you can follow in dealing with the wifi speed issue. Among all the solutions, the best solution you can follow is changing the router position as well as changing the DNS setting.
On the other hand, closing all the unnecessary background apps and switching your Wi-Fi frequency band can also help to increase the speed. So, try a solution today and let us know which one worked well for you.