WD is an external drive, and when you buy the Drive from western digital, you get WD discovery software with it. So, what exactly is this Wd discovery, and is wd discovery necessary?
The WD Discovery program works as a management solution for your external Drive and offers fantastic functionality for your WD gadgets. Thus, it is unquestionably a vital application. To use this, though, you must first have a better understanding of its features.
So, if you have recently bought a WD device and are wondering how to use the discovery software and how to install it, we are here to help you. Today in this guide, we will discuss everything you need to know about WD discovery.
What is WD Discovery?
An application package is WD Discovery. It is the disk management software from Western Digital. You may use it to install and stay current with other WD Applications. Additionally, WD partners may teach it about programs.
Moreover, it is pre-installed on a lot of Western Digital HDDs. Additionally, a few of their portable SSDs have it installed. It offers a comprehensive option for your data protection and recovery needs. Additionally, this program manages all associated WD devices. You can also use wd my passport for Mac using the WD discovery, including my book and my cloud home.
Is Wd Discovery Necessary?
Whether WD Discovery is necessary or not completely depends on your requirements and usages. The fundamental aspects of discovery include protecting your data, customizing RAID configurations, and transferring files from online backups like One Drive or even Google Drive.

Down below, we will look into many of the features of the WD Discovery, and you can decide for yourself whether it is required for you not.
Data Security
The data security of this program, which will use 256-bit AES encryption to secure your hard drive, is its most crucial feature. Additionally, it will make it simple for you to safeguard your device using a password. As a result, you are the only one who can access the Drive.
But you should constantly keep in mind or write down your password since if you lose it, you will be unable to access your disk in any way.
Backup
You may use this software to backup your data, ensuring that you never experience data loss. Therefore, even if you erase any files or data, you can always recover it. Additionally, as the data backups are performed automatically, you are not required to do them manually.
Fault Finder
One of this application’s most distinctive features is error detection. It has a function that will assist you in identifying any issues your Western Digital external drive may be experiencing. Additionally, it will assist you in checking for mistakes such as read-write faults.
How To Use Wd Discovery?
By now, you already know about the features of the WD discovery, and we will discuss how you can install it and use it.
Installation Process for WD Discovery
The installation processes for Windows and Mac are slightly different. First of all, we will look into the Windows installation process and how you can use it.
Step 1: Finding the Software
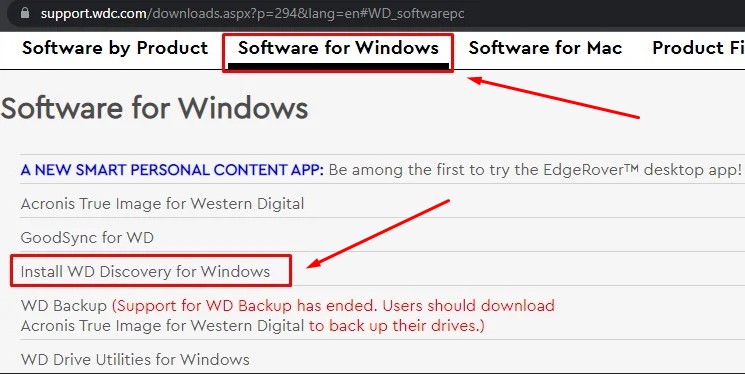
The first step is to download the software and for that, follow this link https://support.wdc.com/downloads.aspx?lang=en#WD_softwarepc. As we are installing software for windows, we need to tab the option for windows as shown in the screenshot below. After that, select “install WD Recovery for Windows.”
Step 2: Downloading the software
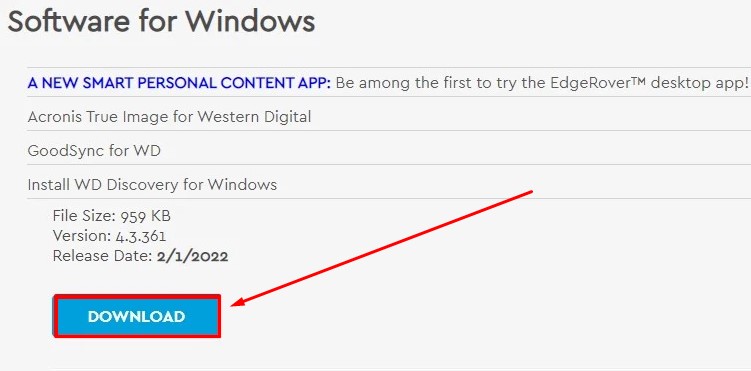
After you have selected which software to install, you will find a pop-up window that says “download.” Click that, and automatically a zip file will start to download.
Step 3: Install the software
Open the downloaded file after the file is downloaded and extract the installer.exe file from it. Additionally, you’ll need to connect any WD devices you’re utilizing, such as a backup drive. When the installation begins, you will be prompted to approve the license.
Keep in mind that the installation procedure may need downloading more files, so keep your internet connection active. The WD discovery program will start running on your computer after the whole installation is opened.
Installation Process for Mac
Down below, we will look into the steps you need to follow to install the WD discovery app on Mac.
Step 1: Finding the File
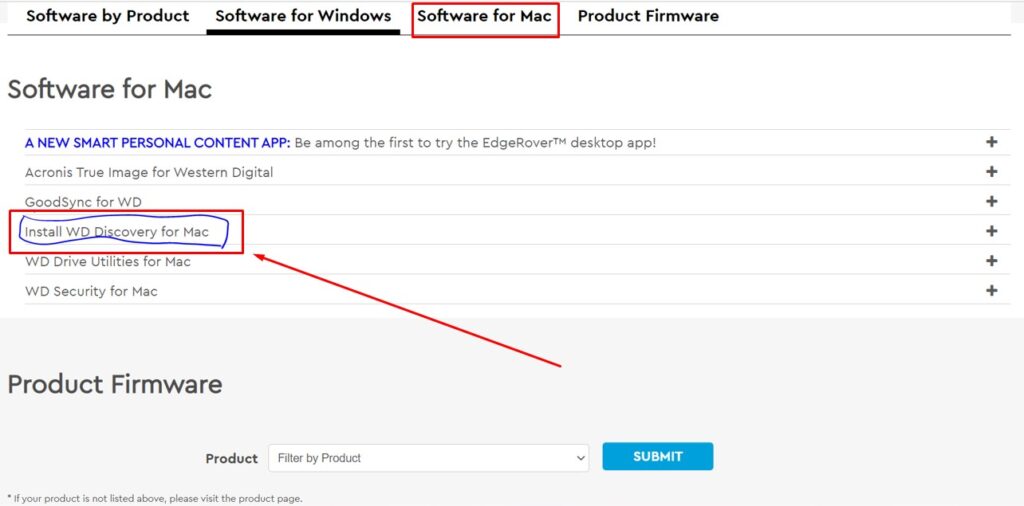
The first step is to download the file; go to the same link where you went to download the file for windows. But instead of the windows tab, select the software for the mac tab. Here click the tab as shown in the screenshot below.
Step 2: Downloading the Software
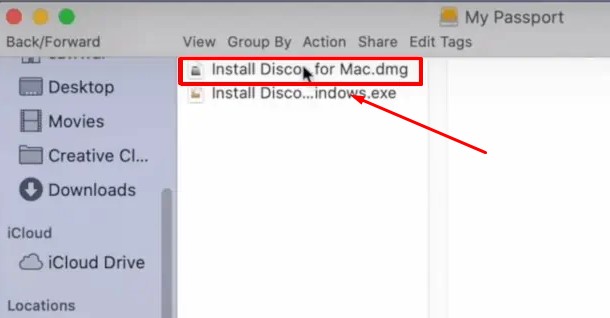
Like the windows method, a download option will come, and when you select it, the software will start downloading automatically. The file will look something like the image below.
Step 3: Installing the Software
When the download is complete, you must open the.dmg setup file and install the program as you would any other Mac application. Install the WD Discovery application now by visiting your application page.
How to use the WD Discovery?
Connect your WD drive first, then start the WD discovery program. The program basically offers three options: utilities, security, and backup.
Choose File Backup from the Backup tab to perform a backup. Depending on your demands, you may also backup the operating system, the whole Drive, or even any specific file and disk.
Select the Security tab to reveal the option to establish passwords for your disk if you wish to encrypt data and set passwords. However, you should choose the Utility option if you want to check for any errors on your WD drive.
How to Remove WD Discovery?
Removing WD discovery from both Windows and Mac is a bit complicated. So, make sure to read the instructions below to make it easier.
Removing WD Discovery from Mac
The first removal step we will talk about is for Mac.
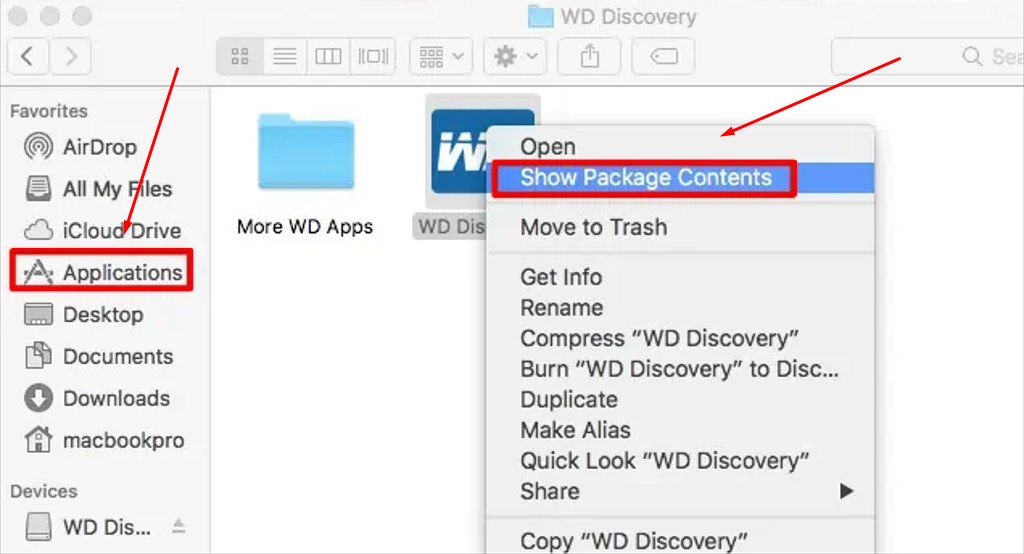
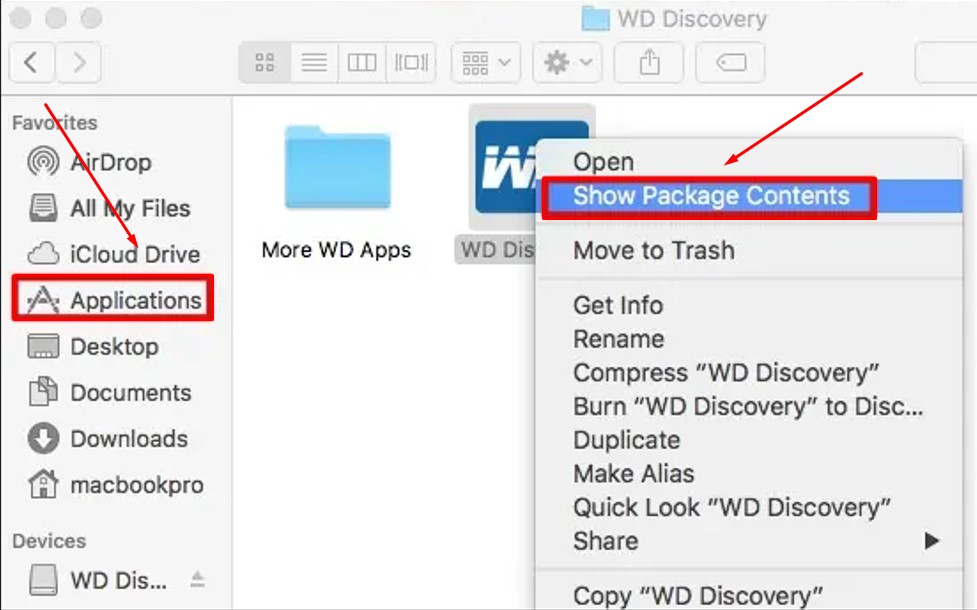
1. Find your Wd discovery application from the applications panel on your Mac.
2. When you find the application, toggle your cursor towards the file and right-click and select show package contents.
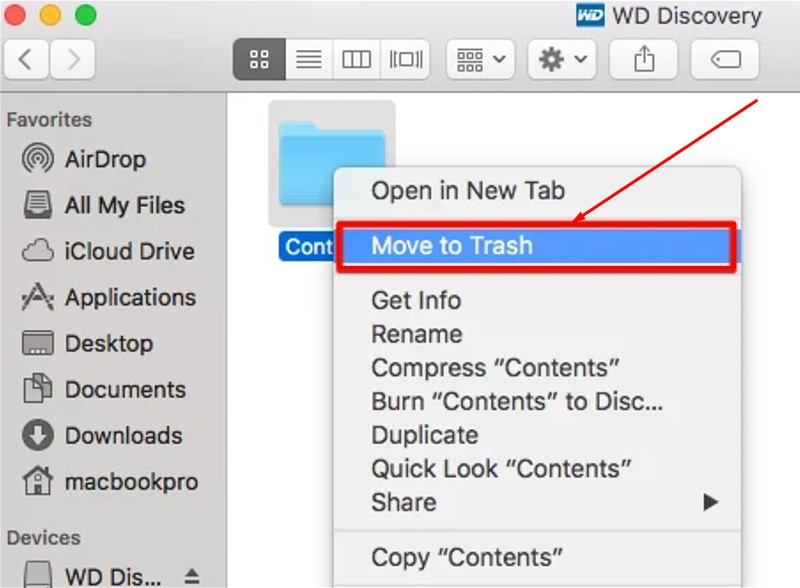
3. You will see a folder named “content,” again right-click the folder and select move to trash, and your WD discovery is removed from your Mac.
Removing WD Discovery from Windows
- Open the control panel and select uninstall the software under Programs to remove WD Discovery from your computer. Now locate the software and choose “Uninstall” from the context menu.
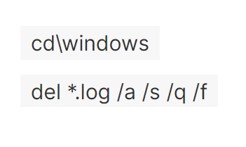
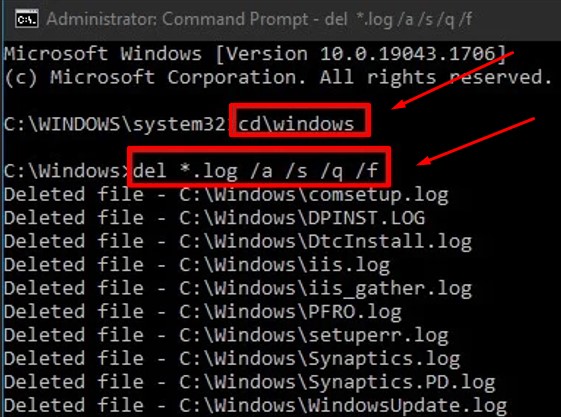
2. Even though we have successfully uninstalled the WD Discovery from windows, the process is yet not completed. So, you will have to clear the log files too.
3. Enter “Command Prompt” by pressing the Windows key in the bottom left corner. After that, select “Run as administrator” by selecting “Right Click” on the Command Prompt.
4. When the command prompt opens up, you will have to type the following commands, as shown in the picture below. As you press enter after inputting the commands, all your discovery-related files will be completely deleted from your windows laptop.
Final Words
Installing and using WD discovery with Wd hard drive is actually necessary as it brings out a lot of advantages and features. You can protect your data more effectively as well as backup everything you want to and keep it safe.
So, if you are thinking of using WD products on your Mac or windows, we recommend installing and using the WD discovery application. This is a free application to install and use; hence, it won’t cost you anything.
Hence, today in this guide, we discussed everything you need to know about this application and how to install and remove the product.