WD My Passport is an excellent device for backup and additional storage for windows. But to many users’ surprise, this device can also be used for Macs. So, how to use WD my Passport for Mac?
Using the WD Passport is as simple as plugging it in for Windows operating systems. However, for Mac users, it’s not quite that simple. To utilize the WD passport with your Mac, you will need to perform some file formatting.
Therefore, today’s article will cover all you need to know about using and configuring this backup device for Mac. So, without wasting any more time, let us go straight into our discussion.
How To Install Your WD Passport Drive On Mac?
The first step of using the WD passport on your Mac is installing it; down below, we will guide you through the complete installation process.
Step 1: Plugging the WD passport
First, you will need to plug in your Wd passport on your Mac. Most of the latest Macs do not have a USB port, so you need to buy an adapter to connect the Passport. When you have successfully connected, an icon on the screen that looks like the image below will pop up.
Step 2: Go To Finder
After you have plugged in your WD passport, you should now go to your finder. The finder is the option just right to the Apple menu at the top right corner of the screen. In the finder, select the “preferences option.”
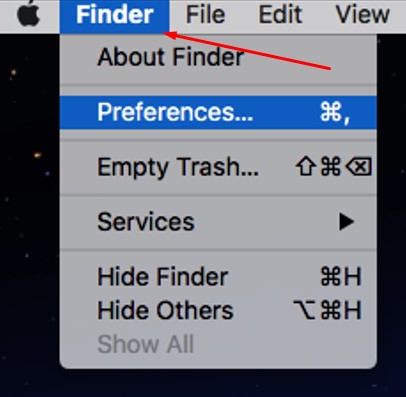
Step 3: Preferences
Click the preferences option, and a new window will come up. Make sure to select all the options as shown in the screenshot below, and the WD passport will now be operational on your Mac.
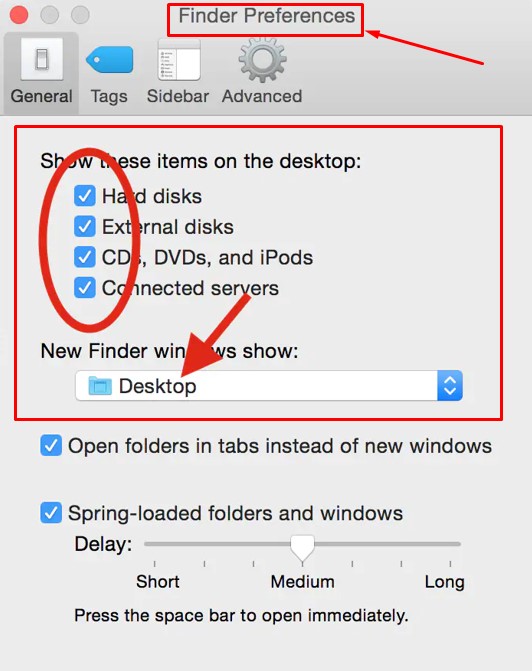
You have successfully installed the WD passport on your Mac, but it is not ready for use, and you will need to follow a few more steps to use it.
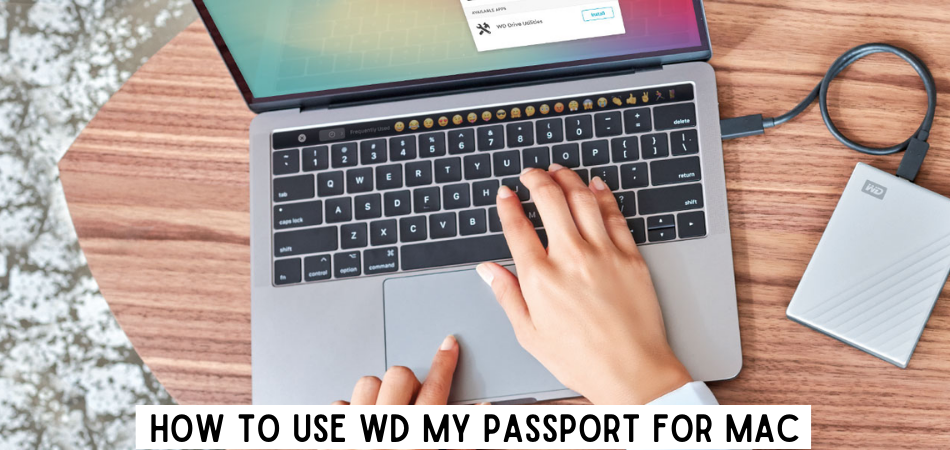
How To Use Wd My Passport For Mac?
The first thing we will need to do is format the WD passport before using it with Mac.
The Format From The Disk Utility
Go to disk utility, you can find it in your applications menu, or you can simply search for it. When you find the disk utility, click and open it.
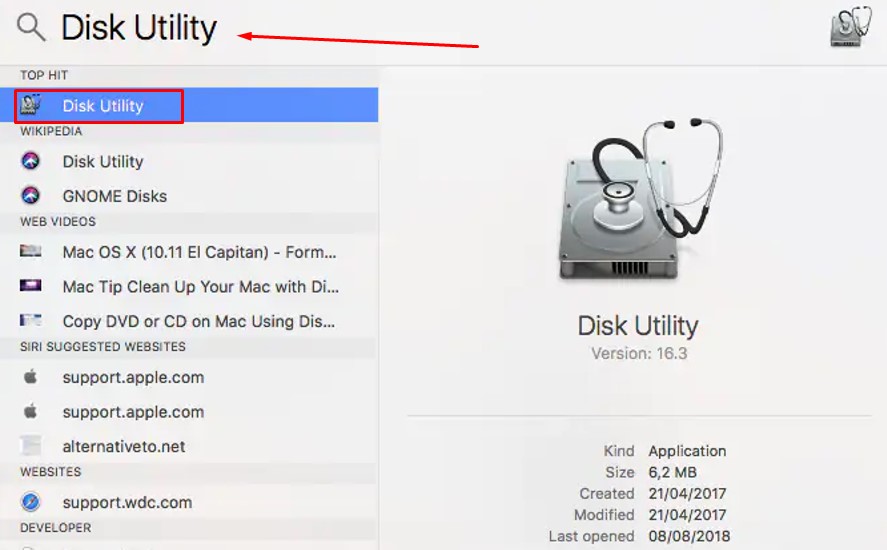
Here, you will be able to see all the drives in your Mac. The Wd passport can be found under the external tab. Select your passport drive.
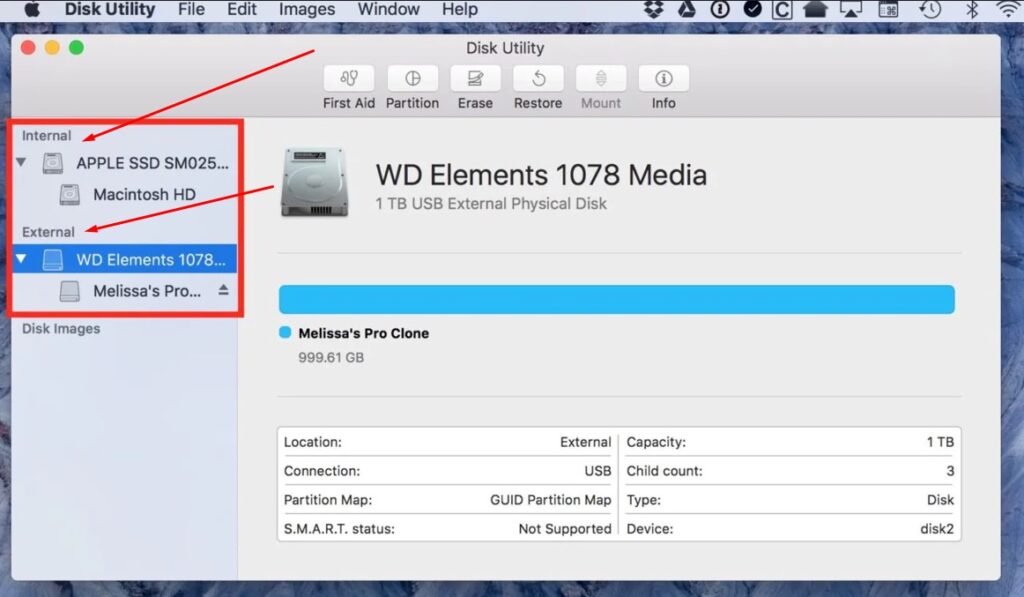
You can find the erase option in the very top corner. Click here to choose your formatting source. Assign your ‘My Passport’ drives a title before proceeding with the instructions in the image below and click erase. Before clicking, make sure to check again that you have input all credentials correctly.
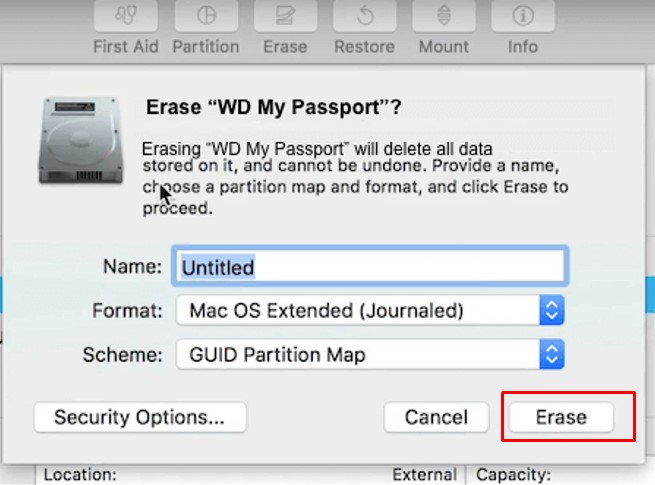
When the erasing is done, you will need to eject the WD passport from your Mac. Right-click on your Wd drive icon and select eject.
![]()
Using Wd Passport With Mac
Now, as you have formatted your WD drive, it is now ready to be used with your Mac. Just follow the steps below to know-how.
Step 1: Creating a new folder
At first, you will need to create a folder on your WD passport. Double click your drive to open it up, and you see a new window.
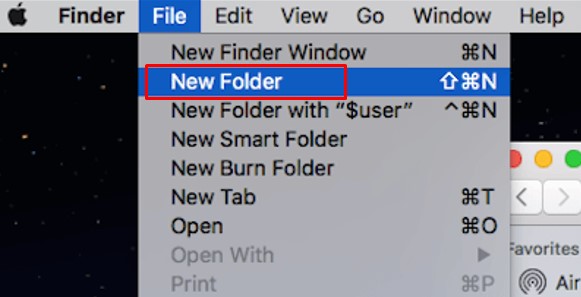
At the top right corner, beside the finder option, you will see the file option; select that and create a new folder. You can name your folder as you want to. Also, you can create different folders, making it easier to organize your files.
Step 2: Inputting files
All of the files on your system may be chosen and pasted for storage. Launch a new finder window on your Mac’s internal hard disk. After that, navigate to the folder where the files are that you wish to transfer to your backup disk.
You can follow different methods to copy your files to the WD drive. But, the best method is to select all files together and drag them to the WD passport.
Choose a number of neighboring items: After selecting the first item, click the final one while holding down the Shift key. The choice includes everything in between.
Additionally, you may click close to the very first object, keep pressing a pointer or touchpad key, and afterward drag over all of the drive’s contents. Then put your mouse away. Your necessary documents have all been moved to the passport drive.
Ejecting The Drive
When you are done copying all your important files and folder in your drive, simply eject the drive out of your Mac and unplug it. Right-click the WD passport icon and select “eject,” and then unplug it from your computer.
What’s The Difference Between WD My Passport And WD My Passport Ultra?
Even though the WD passport and Wd passport ultra have a lot of similarities like auto backup, utilities, and more, they vary in three different perspectives, which are as follows.
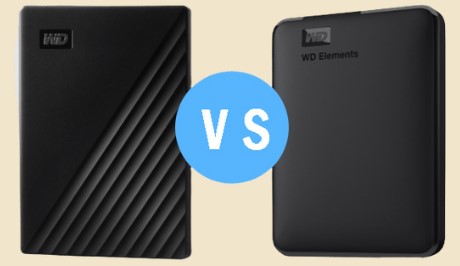
- In comparison to My Passport, My Passport Ultra has a metal cover with a unique style that is relatively slender and tiny, making it easier to manage and carry around.
- Another distinction is that My Passport Ultra is configured for Windows 10, USB-C-ready, and USB 3.0 compliant.
- Passport Ultra comes with an NTFS adapter for Mac, enabling you to use Mac operating systems without having to format it. My Passport cannot be used on macOS without being reformatted into a suitable file format.
Conclusion
WD passports are very effective for backing up important files and documents. But when you want to use it for a Mac, things get a little complicated, and hence today, we discussed easy ways in which you can use this amazing device with your Mac.
Even though WD my Passport can sometimes work without formatting on Mac but we would suggest you format it first. So, always make sure to format it before using it with Apple computers.
Thus, when you buy the WD, my Passport makes sure to read this guide properly and follow all the steps in the correct order for easy usage.